|
What can
blending be used for
When you are painting miniatures blending is used for creating
artificial shadows into cracks and making highlights on raised
areas. You can also use the technique to simulate magical effects on
swords, capes and so on.
In this tutorial I will
discuses two different approaches for using blending on you
miniatures. The first is called "Wet Paint Blending", this is very
useful for large areas such as capes and larger models. The second
one is called "Layering" and is mostly used for painting lesser
areas.
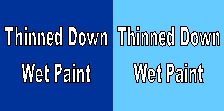
Wet Paint
Blending
The
primary principle in "Wet Paint Blending" is to place two colours
next to each other and then simply mix the paint directly on the
model thus creating a fluent transition. Remember that it is
extremely important that the paint is still wet when you try this.
|
 |
 |
 |
|
Step 1:
Place the two colours next to each other on the model, make
sure that the paint is "wet". |
Step 2: Slowly mix the colours with each other by
drawing the brush from the first colour to the second, and
back again. |
Step 3: The finished result should look something
like this. |
When you
are using the "Wet Paint Blending" technique it is very important
that the paint is wet. I usually add some water or soap. Remember
that this technique is pretty difficult to master so don't give up
after the first try, practice is the only way to learn.
Layering
If you find the "Wet Paint Blending" technique a bit to difficult or
simply are in a hurry then you could use the layering technique
instead. Basically the layering technique is about highlighting the
model by adding layers of lighter and lighter colours. You will
notice though that the transitions between each layer is quite
visible. There are basically two ways of layering:
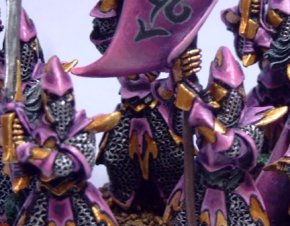 Methode
1: You could simply add the layering, without even using
blending. You can see the effect of this on the picture to the left.
Here the helmets has been based with a dark purple, after this there
has been added two layers of brighter colours to the higher points.
Even though there has only been used three colours on these models
it's still look great. Methode
1: You could simply add the layering, without even using
blending. You can see the effect of this on the picture to the left.
Here the helmets has been based with a dark purple, after this there
has been added two layers of brighter colours to the higher points.
Even though there has only been used three colours on these models
it's still look great.
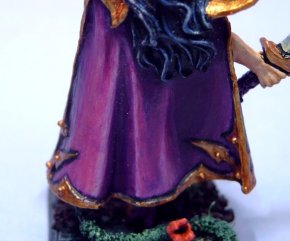 Methode
2: You could also add the single layers and after each step
apply a simple "Wet Paint Blending". You can see the effect of this
on the picture to the left. Here the cape has been based with a dark
purple, after this there has been added four layers of brighter
colours to the higher points. As each layer was applied it was
blended into the previous layer by using a paint so thin that it
blend into the previous layer thus making it impossible to see where
the old colour ended and the new one began. Methode
2: You could also add the single layers and after each step
apply a simple "Wet Paint Blending". You can see the effect of this
on the picture to the left. Here the cape has been based with a dark
purple, after this there has been added four layers of brighter
colours to the higher points. As each layer was applied it was
blended into the previous layer by using a paint so thin that it
blend into the previous layer thus making it impossible to see where
the old colour ended and the new one began.
Below
you see a step by step guide on adding layers: First chose a base
colour (in this case blue), and then simply add each layer one at a
time.
As I
said under the "Wet Paint Blending" remember that these effects take
time to master and you will probably have to practice a lot before
you are satisfied with the result.
Oh and
by the way remember that when using both of these techniques you
will have wet paint on your brush and wet paint flows. When working
with thinned paint try to keep as little paint on the brush as
possible to avoid "accidents"! |
